Last year, Apple unveiled its new iOS 16 operating system for iPhone that brought the ability to schedule emails directly in the Mail app, which is useful for moments when you’re done writing an email but want to send it out at a specific time. Similarly, users have been requesting the ability to schedule texts on iMessage, but Apple hasn’t added the feature — at least not yet.
However, there’s a workaround, and you can schedule texts natively from an iPhone without having to download any third-party application. However, it does have its limitations. The workaround requires Shortcuts, which was introduced back in iOS 12 and comes pre-installed in all iPhones now.
With the Shortcuts app, iPhone users are able to… well, set shortcuts, record voice memos, Shazam songs, manage smart home devices and more, without having to go to their dedicated apps. Similarly, you can set “Automations” from the Shortcuts app, which can run actions based on events, such as time of day, arrival at a location, or the opening of a specific app. A standard shortcut can only be executed from the Shortcuts app or the Shortcuts widget. Automations, on the other hand, are triggered by events, locations, communications, or settings.
Here’s how you can set up an Automation to schedule texts on iMessage:
- Open the Shortcuts app and tap on ‘Automation’ in the bottom-aligned tab.
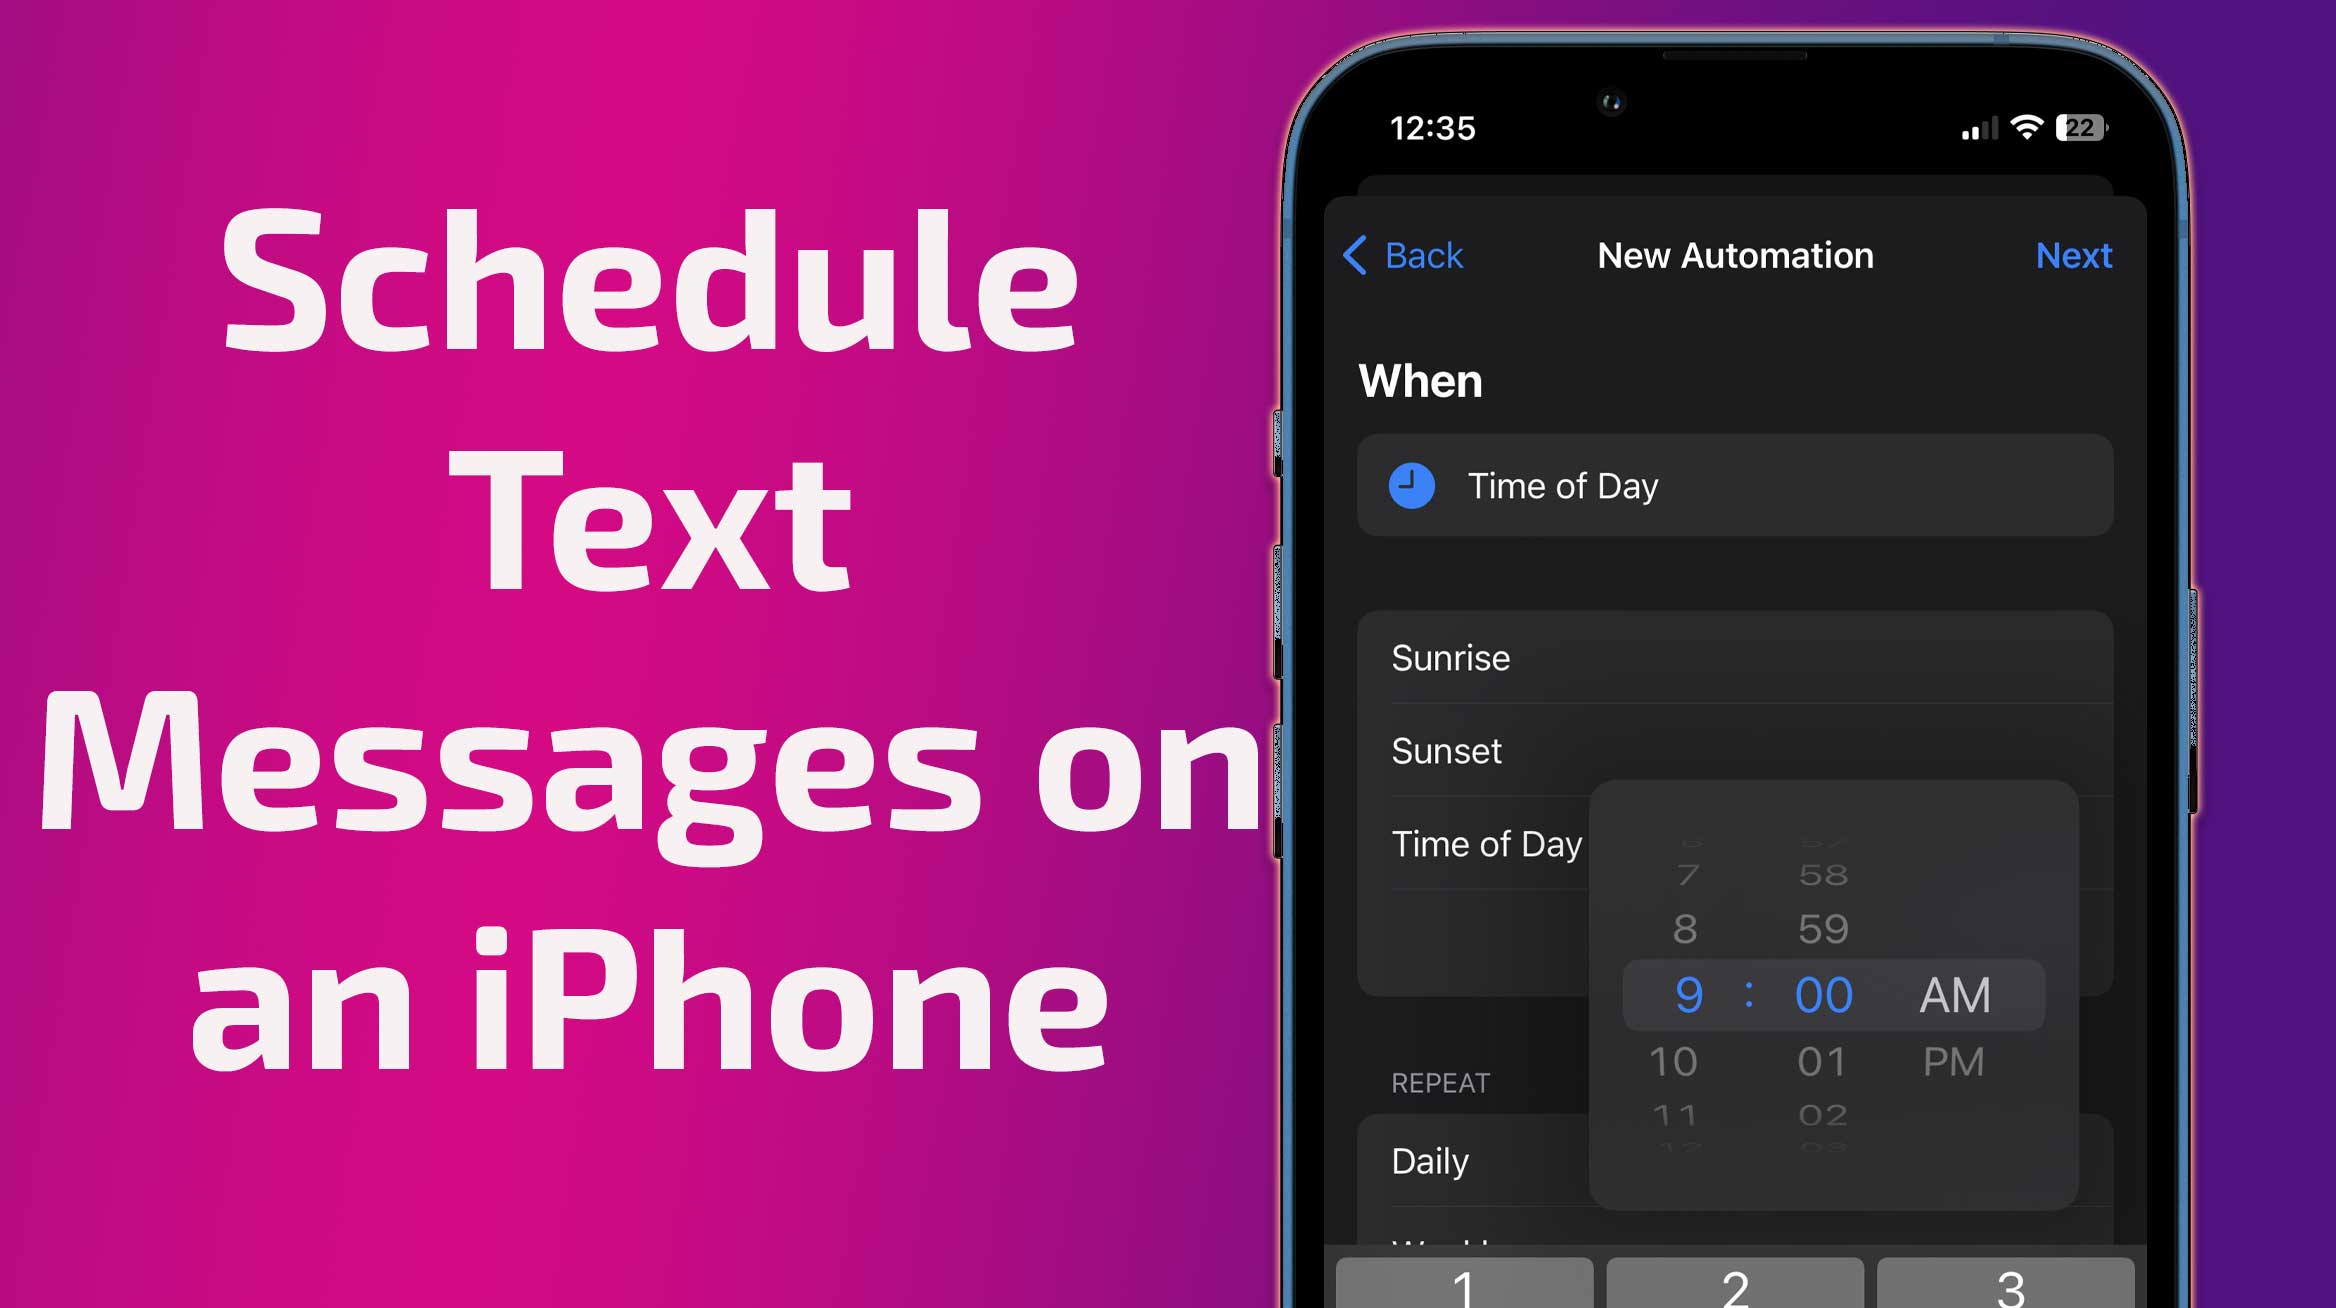
- Tap on ‘Create Personal Automation’ and tap on the first option that reads “Time of Day.”
- Select the time you want to schedule the text from the slider, and tap on either Daily, Weekly or Monthly.
Once the timing and frequency are set, you will define the automation action that the iPhone has to take. You should see a screen that looks like the first screenshot (extreme left) below.
- Tap on “Send Message” under ‘Next Action Suggestions.” If you don’t see the suggestion, tap on ‘Add Action’ and type in “Message.”
- Select the content of your message within the first set of quotation marks, followed by who you want to send it to in ‘Recipients,’ and tap on Next.
- You should be on a screen that looks like the third screenshot below. Enable the toggle to ‘Ask Before Running’ if you’d like your iPhone to ask your permission before sending out the message at the specified time. I have this toggled off, considering I don’t want to receive an extra prompt.
- You can enable ‘Notify When Run.’ This will push a notification to you once the message is sent.
Now, your scheduled message is ready, and it will go out at the specified time. It’s worth noting that the same message will go out to the same person at the same time, depending on the frequency you selected. If your aim was just to schedule a one-off message, then you can delete the automation so it doesn’t send the same message to the recipient daily/weekly/monthly.
To delete an automation, head to ‘Shortcuts’ and tap on ‘Automation’ in the bottom aligned tab. Swipe left on the Message automation and tap ‘Delete.’

