Philips Hue Play sync box and gradient lightstrip review: wholly unnecessary, totally delightful
Am I wrong for thinking our TVs should be a lot cooler by now? We can pretend 3D TVs didn’t happen because they were bad, and curved TVs were a gimmick at best. Yeah, picture quality and form factor has improved a lot since the 1980s, but it’s 2022! Where’s my awesome sci-fi TV?
All that is to say that when I finally got a chance to test Philips’ Hue Play HDMI Sync Box and Play gradient lightstrip, I was hopeful that it would elevate my TV experience. It claims to sync the color-changing backlight (and any other color-changing bulbs you might have) with the content on your TV for a more immersive experience. It’s a “surround lighting” concept to go along with the surround sound we’ve known for years.
This surround lighting experience isn’t quite sci-fi, but it’s still pretty cool. And after using it nearly every night for the last couple of months, I’m sold on it. I know, I’m shocked, too.
How we rate and review products
Let’s break this system down into its component parts. The $250 Play HDMI Sync Box is the brains of the operation. It is, as the name suggests, a roughly 7 x 4 x 1-inch box. On the back are four HDMI inputs and one HDMI output. This is how the system knows what’s on your TV screen so it can color match your lights; all of the imagery is routed through it. It’s a clever design that greatly reduces lag so your lights stay tightly synced, though there is one major flaw to this method, which we’ll get into in a moment. It was somewhat limited when it first launched, but it now supports Dolby Vision, Atmos, and HDR10 Plus, so your programs should look and sound just as good as they normally do.
:format(webp):no_upscale()/cdn.vox-cdn.com/uploads/chorus_asset/file/23940886/20220803HueSyncBox21.jpg)
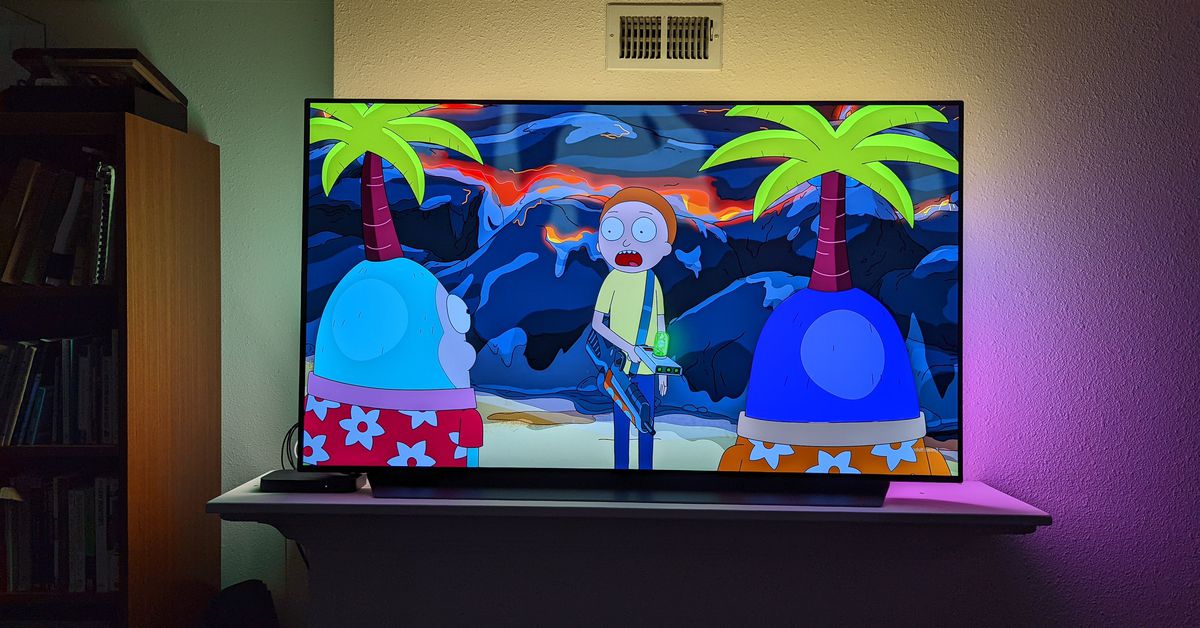
The other major piece is the Play gradient lightstrip, which varies in price depending on the size needed for your TV ($250 for the 55 inch, $270 for the 65 inch, and $300 for the 75 inch). This is a flexible strip of LED lights that affixes to the back of your TV. The 65-inch strip I ended up with contained roughly 80 individual LEDs, but they don’t all have to display the same color at the same time, which is how they are able to create a representation of the many colors being displayed on the edge of your TV screen. The idea is that the colors sort of bleed off of the screen and onto the wall behind it, making the screen feel larger.
There’s one more mandatory component (yup, this is getting expensive) as well as some other nice-to-haves. The mandatory piece is the $60 Philips Hue Bridge, which connects directly to your Wi-Fi router and acts as the central hub for all things Hue. That’s how the sync box will tell the gradient strip which colors to display and when.
:format(webp):no_upscale()/cdn.vox-cdn.com/uploads/chorus_asset/file/23940925/20220801HueSyncBox5.jpg)
The nice-to-haves are any other color-changing Hue lights around your living room. These can all be looped into the sync box’s stream so the colors on your screen can extend not just behind your TV but also all around your room, which turned out to be way cooler than I thought it would be.
Setting up the system was simple, but I had a head start because I already had Hue lights scattered around my apartment (accounting for all of the lights in my living room), which meant my Hue Bridge was already set up with my Wi-Fi and account.
That done, my first task was to add the gradient strip to my TV. The system includes a few plastic guides with double-sided tape that you affix to the back of your TV. Then you just slot the flexible gradient strip into the groove in the guides. This was made slightly more complicated for me because I have a 55-inch TV, and Philips accidentally sent me the 65-inch strip. Luckily, because the strips bend, I was able to add some curves to the straightaways, and everything fit and aligned as intended. (Though I’d recommend getting the right size strip for your TV.) From there, you just plug it into a wall outlet and add it to your home system via the bridge and the Hue app.
Setting up the sync box was even easier. You just take the HDMI cables coming from your streaming devices, video game consoles, Blu-ray players, etc., and instead of running them into the TV, you run them into the sync box and then connect the sync box’s HDMI out to the TV and plug in the power.
From there, you have to install a separate Hue Sync app on your phone. This is where you’ll set up and control your impending light show. If you have multiple Hue lights around the room, you will place each of them in a 3D diagram of a room. This is so the sync box knows what color to turn which light and when so everything flows smoothly. You can also create multiple “entertainment area” setups in case there are times when you only want the TV to be backlit.
:format(webp):no_upscale()/cdn.vox-cdn.com/uploads/chorus_asset/file/23940900/Screenshot_20220802_231606.png)
:format(webp):no_upscale()/cdn.vox-cdn.com/uploads/chorus_asset/file/23940901/Screenshot_20220804_010321.png)
At this point, you’re basically good to go. Start playing some content through the sync box and start tinkering with the settings in the Hue Sync app to make the system work like you want it to. On the app’s main screen you can change between video, music, and game modes, adjust the intensity between subtle, moderate, high, and extreme, and adjust the brightness with a slider.
I learned very quickly that I really liked tailoring the experience to the specific content I was watching. For example, if I was watching a movie like Everything Everywhere All At Once, I’d want it in video mode on high intensity with the lights around 65 percent brightness. For movies that were at a slower pace, I preferred the moderate intensity. If I wanted it to have abrupt, near-instantaneous reactions, I switched to game mode and extreme intensity. If I wanted to play music through my TV and have a party vibe, I’d turn it to music mode, which doesn’t really look at the colors on the TV but instead makes the lights pulse along with the beat.
Each of these modes worked shockingly well once I’d tweaked them to my liking. As a cinephile, I really thought that I wouldn’t want to use this system for movies, assuming that they’d be a distraction, but I didn’t find that to be the case at all. As long as the brightness and intensity were set properly, it didn’t overwhelm the film. Instead, it brought me into the world of the movie. It felt more like I was sitting in the same room with the characters rather than viewing them through the window of my TV.
Watching The Simpsons filled my living room with the bright pastel colors of Springfield, and it was a delightful feeling. While I don’t currently have a gaming system setup, I watched a ton of gameplay videos while in game mode, and it was a blast with my apartment lighting up with explosions, laser fire, or bucolic grassy greens depending on the game. While music mode probably isn’t something I’d use unless I were throwing a party, I have to say that the beat matching was exceptional, and I loved seeing my apartment pulse along with beats in Anderson .Paak, Beyoncé, and J. Cole’s music. (It worked well with music videos, too.)
:format(webp):no_upscale()/cdn.vox-cdn.com/uploads/chorus_asset/file/23940921/20220801HueSyncBox10.jpg)
:format(webp):no_upscale()/cdn.vox-cdn.com/uploads/chorus_asset/file/23940936/20220802HueSyncBox19.jpg)
It’s worth noting that while I have eight Hue lights in my living room to play with, I spent a lot of time using the sync box with only the gradient strip on the back of the TV and all the other lights turned off. That alone worked extremely well. It puts out a significant amount of light (1,100 lumens, roughly the equivalent of a 75W bulb but distributed in a long ring), and I often have it on even when the TV is off because it adds more light to my living room and can be controlled like any other light with the regular Hue app. Nature documentaries really popped. When watching movies, I felt like it reduced eyestrain, but it didn’t pull me out like having normal lights on would.
For gaming, the response time is lightning-quick and makes it feel far more immersive. Last year, when our Thomas Ricker reviewed the (massively less expensive) Govee Immersion TV Backlight, he found that it was prone to falling behind the content on-screen, but that wasn’t an issue for me with the sync box, especially in gaming mode. For movies, the slower transitions of moderate intensity made the effect more subtle and feel soft and natural.
Integrating the other Hue lights in my living room wasn’t as smooth of an experience, though. When I was watching a movie or a TV show, I discovered that I really didn’t like seeing any of my lights directly or they would become distracting. The way around this is to create an “Entertainment Area” in the Sync app that does not include those lights. Creating a new area is a bit of a pain, and for some reason, the app doesn’t let you edit the areas you’ve already made.
The bigger problem is that once you start syncing content with the TV, those lights that you’ve now excluded remain in whatever state they were in beforehand. So if they were on, you have to exit the Sync app, open the regular Hue app, and turn them off manually. It’s just a few clicks, but it’s really annoying that you can’t do all of this from just one app. The sync box works with Google Assistant and Amazon Alexa, but while it responds to some voice commands, I have yet to be able to get that process automated. I’d also like to see the ability to switch between entertainment areas added directly to the homescreen so I don’t have to dive into the settings as often (though that won’t be an issue if the gradient strip is your only Hue light).
:format(webp):no_upscale()/cdn.vox-cdn.com/uploads/chorus_asset/file/23940933/20220801HueSyncBox13.jpg)
Now to the biggest flaw in the system. As the name HDMI Sync Box suggests, this whole thing only works for content that’s coming in through an HDMI cable. That means that if you use the built-in app on your smart TV or even a digital antenna to pick up local broadcast, you are out of luck because the sync box will not work with that content at all. Even the $90 Govee system mentioned above can do that. (Though it requires placing a small camera in front of your TV screen, doesn’t work as smoothly, and doesn’t play as nicely with other smart lights.) Personally, this was not an issue for me because I hate my TV’s built-in apps, so I use Chromecast with Google TV for everything. The same would be true if you use a Roku, Apple TV, Amazon Fire TV Stick, Xbox, PlayStation, or cable box that runs through HDMI. Still, there are tons of people (some of my close relatives included) who just use the built-in apps on their TVs, and if you’re one of them, you do not want this product.
It also must be said that, together, the sync box and gradient strip cost more than $500 (more than $600 if you need to purchase the Hue Bridge, too). That’s more than the cost of a lot of very decent TVs, and that puts this in the realm of luxury products. Among smart home products, Hue has a reputation for being polished, working well, steadily adding features, and playing nicely with other smart home items, and its lighting often costs more than the competition as a result. A lot of people have already bought into the Hue ecosystem (as I have), and for them, while this still isn’t cheap, it adds a whole new dimension and bag of tricks to your home lighting system.
Photography by Brent Rose for The Verge
